Saturday, November 1, 2014

Open DoVision Compatibility

Compatibility

Outstanding compatibility. Universal and omnipotent.

A super-wide range of usage possibilities can greatly extend the functionality of one product. That's why Open DoVision use human interface device (HID) protocol. That's also why it supports more video feeds than any other virtual reality headset. Open DoVision uses more universal solutions to enlarge the compatibility and ease your way to develop - and innovate - that matter most.


Universal HID.

With universal HID protocol you can enjoy playing virtual reality games on Windows, Linux, Mac, and more.
Open DoVision also can be a flying mouse - a USB HID that move the cursor according to real-world movement to simulate tracking result on the games that don't support Open DoVision. And after slightly change the structure of the Open DoVision, you can play the games that don't even support virtual reality rendering.

More video feeds than any other VR headset.

Open DoVision can take HDMI, VGA, or AV as a video feed. That means you can use the Open DoVision in virtually everywhere that render out one of these three the most common video feeds. Your laptop, PC, or Xbox.


Do anything, anywhere.

With Open DoVision, you can enjoy all the games in Windows, Linux, Mac, and more other platforms despite whether the game support virtual reality or not.

Gaming is only a small part of what Open DoVision can do. Together with many other features like extensible design, it can be a private cinema, FPV goggle or whatever you want. just change one part, and here you go.

Friday, October 31, 2014

Open DoVision Technology

Technology

Hugely powerful. Enormously versatile.

Open DoVision features an D1 board built on ARM-based Cortex-M4 32-bit architecture. It comes with an MEMS three-axis angular rate sensor and an ultra-compact high-performance eCompass module which has a 3D accelerometer and a 3D magnetometer in it. With an on-board debugger, you can test your firmware on the board itself.

D1 board.

High performance that's highly versatile.

With 250/500/2000 dps three selectable full scales, MEMS digital gyroscope features 16 bit-rate value data output, 8-bit temperature output, integrated low- and high-pass filters, and embedded FIFO. Ultra-compact eCompass module comes with 3 magnetic field channels and 3 acceleration channels with linear acceleration full scales of ±2g / ±4g / ±8g / ±16g and a magnetic field full scale of ±1.3 / ±1.9 / ±2.5 / ±4.0 / ±4.7 / ±5.6 / ±8.1 gauss.

Great USB support. Even while powering great features.

D1 embeds an USB device peripheral compatible with the USB full-speed 12 Mbs. It has software-configurable endpoint setting and suspend/resume support. The USB has a dedicated 512-bytes SRAM memory for data transmission and reception. With the USB-FS-Device Library, you have full control of every aspect of Open DoVision's functionality. 

Two hundred components light.

Designed with the idea of efficiency, D1 board uses only two hundred electronic parts to offer limitless possibility. And it also is ECOPACK® RoHS and “Green” compliant.

Open DoVision Design

Design

Simple design. Extensible design.


In creating Open DoVision, we scrutinized every element and possibility. That's how we arrived at a low-poly, screwless form. Extensible design made possible by only four sections with their own functions. And intuitively crafted mechanisms. All made with beautiful matted plastic, and glass. It's hundreds of hours of working and testing that add up to something simple.

An innovative screwless design.

The first thing you notice when you hold Open DoVision is how simple it looks. The nine-face hooks of each section lean inward to caught following section tightly. There are no excess decorations. No screws. Just all the necessities that Open DoVision needs. 

3D-print-ready. Inside and out.

Designing a powerful, extensible virtual reality headset with full 3D-pint capacity was no small task. It required carrying the idea of "3D-pint" through out the whole design process. It called for non-overhang structure when you want to have something at that height. And it meant simplify the connections and mechanisms, all while giving them more strength. All of which yield a firm 3D-pint-ready design.

The elements of simple design.

To create a open-source virtual reality headset that's powerful, yet simple to use and develop, each detail was meticulously designed, crafted, and tested until Open DoVision had an elegantly simple form. 

Tuesday, October 28, 2014

Open DoVision

Open DoVision

Virtual reality at your disposal.
The Open DoVision isn't simply a virtual reality device - it's a full set of tools made for everyone to explore the VR technology. Powerful, yet designed out of simplicity. Versatile, but incredibly easy to modify. With a high-resolution display that harmoniously accompany with low-latency sensor board. It's a remarkable starting point where functionality and openness seamlessly meet, creating the most open, yet accessible virtual reality headset in the world.

Simple design. Extensible design.

Developing a virtual reality headset with endless capacities, easy of access meant simple and extensible design. From the screwless connections between parts to the elegant low-poly surface, every detail ware carefully considered to extend the functionality. So while it looks elegantly simple, Open DoVision offers you with limitless possibilities.

Hugely powerful. Enormously versatile.

Built on 32-bit ARM architecture, the D1 sensor board delivers large storage for your codes and memory at run-time. It efficiently gathers data from gyroscope, accelerator, and magnetometer. And with a on-board debugger, Open DoVision lets you test programs on the board.

Outstanding compatibility. Universal and omnipotent.

Using standard HID protocol to communicate with the computer, Open DoVision is driver-free. And it support more video feeds than any other headset so you can have fun in a lot more scenarios.

Not just a remarkable headset. An open-source headset.

It's one thing to make a functioning headset. It's something else entirely to make a open-source virtual reality headset with enormous extensibility and high compatibility at incredible low price. But that's exactly what we did with the Open DoVision.

A virtual reality headset. A private cinema.

More people enjoy watching films more in cinema than in other place. And now the Open DoVision can really be a private cinema, FPV goggle or whatever you want to call it. just change one part, and here you go. Of course you can play the game that don't even has virtual reality functionality.

Thursday, October 9, 2014

Open DoVision User Manual - Chapter 3 Extension


3 Extension

The extensions are the functionality that do not come with the original Open DoVision, but can achieve by adding or changing some of the parts.
The extensions will show you the reason of the Open DoVision's existence.
Of course, if you get ideas, please tell me at kailanfu@gmail.com

3.1 Open DoVision CE

Open DoVision CinEma

3.1.1 Description

Make your Open DoVision a private cinema. Enjoy the huge screen occupying your whole view.
Also, use this extension can enable you to play all the games including the games that are not even ready for the virtual reality usage!
This is achieved by changing the T1 to the Tce procvided and the number of lenses used. The final effect is like placing a television in front of your eyes.

3.1.2 Instruction

Go to Thingiverse download all the files in the Open DoVision CE x.x and print it out. You'd better use 1.2mm shell thicknes instead of 100% infill, because the wall is only 2mm thin (0.4 nozzle) and 2mm layer height, for the quality of the model did not really affect the quality of the vision.
I uses about 4h to print out that, using 100mm/s printing speed250mm/s travel speed230C printing temperature. As I said before, all the plastic parts of Open DoVision ARE 3D print ready, so there is no need to use any support.
Replace the T1 with it. And add One 3x fresnel lens or One 3x convex lens using lens adopter for each eye.
Done!

3.1.3 Usage Hint

Note that we offer two different place for the elastic band over your head to thread. You can try them and decide which one to use.

3.2 Open DoVision PO

Open DoVision PhOne

3.2.1 Description

Enable the Open DoVision to take the advantage of your smartphone.
Just replace the SC with the POC we offer and place your phone in the middle.

3.2.2 Instrction

Go to Thingiverse download all the files in the Open DoVision PO x.x and print it out. You'd better use 1.2mm shell thicknes100% infill, and 2mm layer height because the wall is only 2mm thin (0.4 nozzle) and 2mm layer height and only the hardness of the model matters.
I uses about 1.5h to print out that, using 100mm/s printing speed250mm/s travel speed230C printing temperature. As I said before, all the plastic parts of Open DoVision ARE 3D print ready, so there is no need to use any support.
Open the virtual reality app on your smartphone, thread a right size of Non-slip mat into the POC, place your smartphone in the middle of the POC, fix your phone with three elastic bands, and replace the SC with it.
Done!

3.2.3 Usage Hint

You can combine the Open DoVision CE extension with this, watch movies in the cinema from your smartphone.

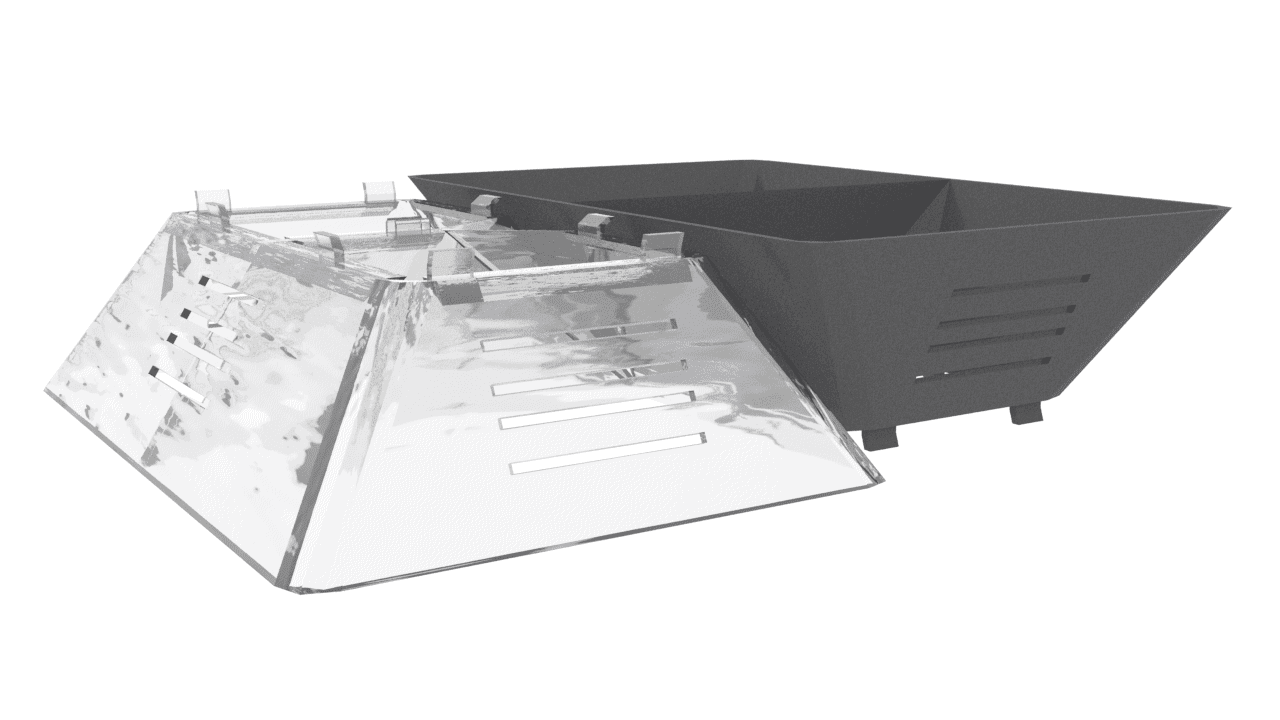
3.3 Open DoVision ON

Open DoVision OmNipotent

3.3.1 Description

Want to use your own electrics? Go!
Open frame for all cases possible.

3.3.2 Instruction

Go to Thingiverse download all the files in the Open DoVision ON x.x and print it out. You'd better use 1.2mm shell thicknes100% infill, and 2mm layer height because the wall is only 2mm thin (0.4 nozzle) and 2mm layer height and only the hardness of the model matters.
I uses about 1.3h to print out that, using 100mm/s printing speed250mm/s travel speed230C printing temperature. As I said before, all the plastic parts of Open DoVision ARE 3D print ready, so there is no need to use any support.
The first few layer is a little tricky to print, because there're many holes... But I'm imagining a better 3D printer can do better job.
Then you have to fix the elastic bands to the holes, I uses elastic bands of 1.5cm, 2.5cm, and 5cm diameter:

Then... fix the electrics you get to the elastic bands!


Enjoy!

Usage Hint

The four vertical elastic bands can holds the sensor board you use very tightly.

Open DoVision User Manual - Chapter 2 Usage


2 Usage

2.1 Bought from DotLab

How to use the Open DoVision if you brought it from DotLab somehow?

2.1.1 Prepare

Generally, if you brought the Open DoVision from the DotLab, you will get at least following parts:
  • LCD Display
  • LCD Controller Board
  • Sensor Board
  • Fresnel & Glass Lenses
  • Power Adopter
  • Cables
  • Elastic Bands
  • Plastic Parts
The electrics will be installed by us and you only have to add elastic bands and lenses to it.
  1. Find the plastic part looks like this:
It's called LE.
  1. Thread the elastic bands to the LE like this:
  2. Find the plastic part looks like this:
It's called T1.
  1. Thread the other ends of elastic bands to the T1 like this:

  2. Adjust the length of the elastic bands to get a comfortable feeling.

2.1.2 Check(Setup Cables)

To ensure that there are on problem with your Open DoVision, we suggest you follow the instructions below:
  1. Just plug in the Power Adopter. You should see the LCD display turns blue.
  2. Plug in the VGA/HDMI/AV Cable at your choice, and the LCD should turns to the image of your PC background image.
  3. Plug in the USB Cable. The mouse now should move with the movement of the Open DoVision.
If all above phenomena happen, your Open DoVision is ready!
If unfortunately something when wrong, please go to the Trouble Shouting section.

2.1.3 Lens

All kinds of lenses can be used to get Open DoVision working.
You will get two kinds of lenses:
  • Fresnel Lens
  • Glass Lens
the Glass Lens can be fixed to the Open DoVision using Lens Fixer


After you can apply multiple fresnel lenses to one eye.

Test them, and find the best arrangement for yourself!
The final assembling goes to the 2.2.4

2.1.4 Use

Just open a game that support side-by-side stereoscopic rendering, and put on the headset!

2.2 DIY

2.2.1 Prepare

If you want to make a Open DoVision yourself, you should go to following websites for more information about the specific parts you are making:
  • Thingiverse All the plastic parts
  • GitHub Firmwares for the sensor board
Go to the Open DoVision x.x in Thingiverse and download all the models and print it out use your 3D printer.
And buy some stuffs:
  • HJ070IA-02D LCD Screen Panel Display
  • PCB800182 Signal Converter
  • T.VST29 Controller Board
  • STM32F3DISCOVERY Sensor Board
  • mini-USB to USB Cable
I know that finding the right parts will probably be a nightmare, so we make a Extension that give you full ability to use the parts you want! Please scroll down to the Extension section for more information.
And check again:

2.2.2 Sensor Board

Now, to make the Sensor Board ready to use, please go to GitHub and download the .bin file in the usb-mouse folder, or other versions in other folders, and download STM32 ST-LINK Utility from ST.
...Or you can use the source files on the GitHub to make the project and get the binary file yourself.
  1. Open the STM32 ST-LINK Utility
  2. Load the binary file
  3. Plug the USB cable to the STM32F3DISCOVERY's debug port and your PC
  4. Connect to the target and Program Verify
  5. Disconnect from the target and unplug the USB cable from the debug port.
To test it, just plug the USB cable to the user port of the STM32F3DISCOVERY and move it to see if the mouse is moving as STM32F3DISCOVERY moves. If it is, the sensor board is ready.

And, in order to conserve more room, it is recommended to cut of long pins:

2.2.3 Electronics

Plug the cable like this:
Plug in the Power Adopter to see if the screen goes blue, if not there must be something wrong.
Connect the cables like this:
Plug in the VGA/HDMI/AV Cable at your choice, and the LCD should turns to the image of your PC background image.
Plug in the USB Cable. The mouse now should move with the movement of the Open DoVision.
All done! Your DIY Open DoVision is ready to use!

Note that when installing the screen, I recommend you to follow steps below:

2.2.4 Case

Slide in the T1 to the SC.
Stack the T2 onto T1.

Fabricate the elastic bands to the LF and T1 as told in the 2.1.1
Done!

2.3 Super DIY

If you can edit 3D model, you can try for Super DIY, which DIY the case according to the needs.
Go to Thingivers find Open DoVision OR x.x, get models, and then you can adjust the position of each part as you need,
or change the height of some parts to fit in with your parts.
And then, you can have your own parts printed.